

13 Tips for Improving Camera Phone Photos
Looking for some tips on improving to quality of the pictures taken with your Sidekick? Here are some generic tips that apply to most camera phones:
13 Tips for Improving Camera Phone Photos
Some of these don’t apply to the Sidekick 3 (like the zoom), but others are useful things to keep in mind. Anyone have any additional tips that are Sidekick 3 specific? Our #1 tip, be patient and let the Sidekick 3 adjust to the light. Oh, and try to keep it still.

July 13th, 2006 at 10:12 am
first
July 13th, 2006 at 10:46 am
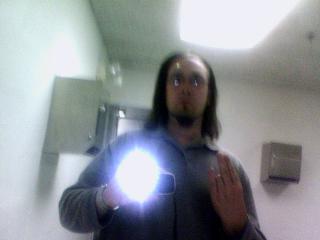
chicago2600 steals the peach!
July 13th, 2006 at 10:49 am
Photoshop Trick for Removeing noise, and getting a cleare picture. This wont take away the blur, but it will take out all that static lookin stuff from ht3 cams
From PhotoShopCS2 simply go to Filters > Noise > Noise removal
…the default setting works most of the time, otherwise its just a matter of small adjustments from that box.
Remove Noise
For Photoshop CS and Higher
Taken from https://tricks.onigo.net/wiki/index.php?n=Main.RemoveNoise
1. Apply Gaussian Blur to the image at a level where the color noise is sufficiently blurred away (about the level you’d use with the LAB trick below).
2. Go to Edit > Fade Gaussian Blur, choose 100%, and in the Mode pulldown, go to near the bottom and choose Color and click OK.
For Other Versions of Photoshop
Step 1:First open an image that has a lot of noise in Photoshop. Images with a lot of noise will look speckled with red, green and sometime blue dots. Other times noise will take other forms, but digital noise almost always comes from shooting a picture in a digital camera while using a high ISO or film speed.
Step 2: Go to the “Image” menu then “mode” then “Lab color” this will convert the image from the RGB mode to the lightnes and a and b mode. Lab color mode splits the image into a lightness channel that stores the black and white information of the image along with the detail and two color channels a and b that just store color information.
Step 3: Since most digital noise resides in the a and b channels of the image in LAB mode, and most of the detail is in the lightness channel we can effectively remove noise from the image by carefully blurring the a and b channels and slightly sharpening the lightness channel.
To blur the a and b channels simply open up your channels pallet and select the “a” channel by clicking on it in the pallet. You should notice your image turn a bunch of funny shades of grey. If your channels pallet isn’t visible check to see if it’s docked with the layers pallet, if not just go to the window menu and select channels.
Step 4: Now go to the filter menu and select noise then median.
Step 5: Adjust the settings so your image looses the rough feel but not so much as to totally smooth your whole image into one massive blob. Then do the same thing with your “b” channel.
Step 6:Now select the lightness channel and go to the filter menu then sharpen – unsharp mask. This step sharpens the lightness channel. The settings you use for both the blurring of the a and b channels and the sharpening of the lightness channel will depend on the size of your image and the amount of noise. It best to try your settings on the conservative end of things at first then see how your image looks. If the settings were too low just undo and repeat the steps with more aggressive settings.
Step 7: After finishing the sharpening simply go to the image menu and select mode then RGB. Your image should now be less noise with a very minimal loss of sharpness.
July 13th, 2006 at 11:43 am
dats gooood
July 13th, 2006 at 1:58 pm
Shock on.
January 27th, 2007 at 8:42 pm
used laptop in canada
It is used laptop in canada for alley step or get in, and i deliberate over it unsuitable for operation.